Wednesday, May 29, 2024

MSX show in Paris on June 22 & 23

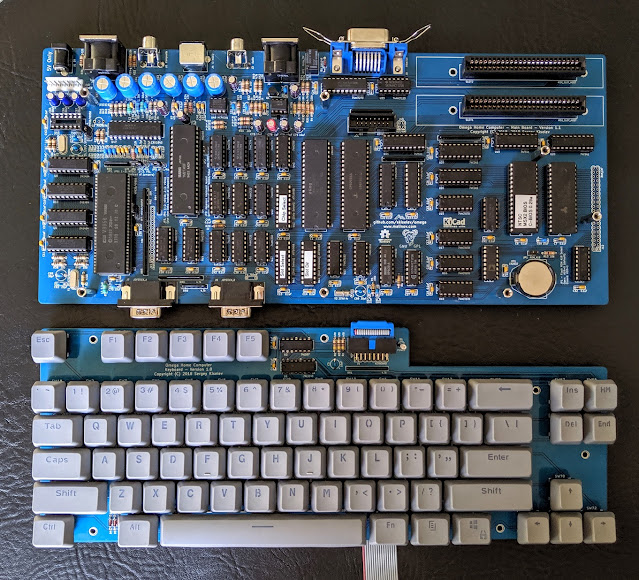
 It's been a few years now that, somewhat by chance, I became interested in the MSX standard that appeared in the early 80s. In fact, 'because' of Sergey Kiselev and the creation of his MSX2 compatible computer, the Omega :


Then, while trying to make this machine work, little by little, I got into its hardware and, through the forums, I met people interested in the same subject.

Since 2021, the year I really started to discover MSX, I have noticed that not only are there reference people on the subject in France, but also that the community is growing, slowly but surely. It's very encouraging.

So much so that this year, the association MO5, an association known in France for its work in conserving computer equipment, is organizing a meeting this year focused on the MSX standard with even the presence of Kazuhiko Nishi.


No, not Billy, the other person ;-)

Here is the information poster:


All information is available here: https://jmsx.mo5.com


Friday, April 26, 2024

Ultimate MSX cartridge modification


I made two final changes to the design of this cartridge. 

First modification.

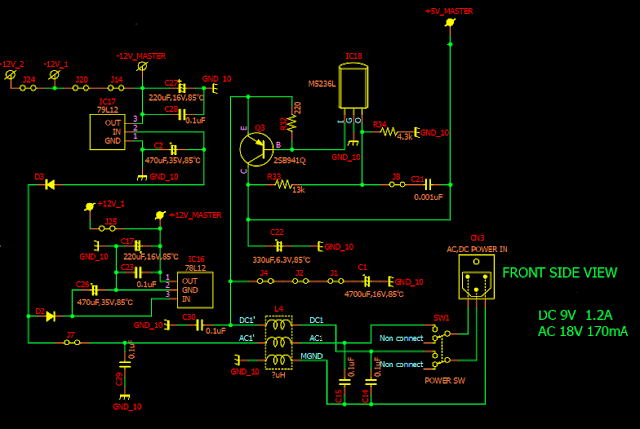
The first concerns the interfacing circuits with the MSX bus : Aoineko, the developer of the MSXgl graphics library who also tests the cartridge, reported to me problems with random startup of his computer. After studying his problem and especially after looking at the datasheet of his Panasonic FS-A computer, I realized that the power supply of this machine was 'unconventional' to say the least. This results in potential ground problems :


I guess you 'see' what I mean. The wire that serves as a ground reference is one of the two wires of an AC power supply! Hmm, I don't like that at all. 

With this type of design, the ground is always noisy for anyone who wants to connect to this type of device by taking the electrical reference of this ground. 

I therefore powered the cartridge interface circuits no longer directly with +3.3V via the cartridge's internal regulator, but directly via +5V from the MSX computer. No no, the problem was not a bad adaptation of the signal thresholds. TTL circuits work very well with commands not in +5V but in +3.3V. The HIGH level must be at least 2V, which is the case. On the other hand, it is true that this leaves a noise margin of 'only' 1.3V in the case of supplying the interface circuits with 3.3V, and given the design of the Panasonic FS-A1 power supply, I tell myself that that's a bit fair. 

Very good, but then I just postponed the problem elsewhere? It's true. But the interface circuits used, even if they can be powered by 5V, still accept signals coming from circuits powered by 3.3V. The minimum voltage for a high signal is 1.7V on these circuits. I therefore gain 300mV of noise margin. I hope this will be enough.

I still purchased a USB bus isolator in case my modification does not work on the Panasonic FS-A1. This will at least validate my 'theory'.


Second modification.

This time, it is the automatic RESET system of the MSX computer. I implemented directly on the cartridge, a system which allows the computer to be placed in RESET mode for the duration of the cartridge loading. In doing so, and once the cartridge has been loaded correctly, the MSX computer wakes up and boots directly from the cartridge : great!

The small 'problem' of this solution is that it is necessary to intervene inside the MSX computer to locate the reset system, in order to connect the RESET 'wire' coming from the cartridge. 

This is a very simple operation to carry out for those who know how to do it, but this is not the case for everyone. The solution then consists of finding a way to turn off the power to the MSX computer and then turn it back on once the cartridge has been loaded. Without using any wired connection because it is too dangerous. So I opted for a wireless solution.

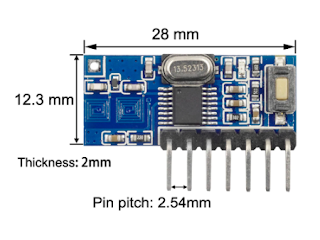
I bought some small 433MHZ modules:


These models are simple enough to use and small enough to be integrated without major modification on my cartridge.


And there you have it... The first tests were functional. I was able to easily turn on and off a small LED connected to a receiver module placed a few meters away.

The receiver module:


To finalize the subject, all I have to do is develop the receiving system. It will simply appear in the form of a remote controllable mains socket. However, I use universal AC outlets so it can be used just about anywhere :


This circuit is simple and easy to assemble. I also think I will use it not only for the type of application targeted here, but more simply as a remote-controlled socket. You can easily find small remote control 'keys' on the Internet that will work very well with this HF receiver.

Warning :

The HF systems and the design of the cartridge have not been the subject of any certification request. However, the transmission power in games is so low that this does not pose a problem. However, not to be used in a sensitive environment such as healthcare centers....

Monday, April 15, 2024

8 Ports USB Midi interface.


This topic is a very long-standing one for me. I must have started thinking about it in the early 90s. At the time, the power of microcontrollers did not allow the development of complex systems. I then remember having developed a 68000 system to manage the 8 MIDI ports. I never created this system because I realized that it was far too complex to create and therefore necessarily too expensive.

10 years later, at the beginning of the 2000s, things improved in terms of the possibilities of embedded systems. So I tried to create this multi MIDI port using a micro-controller. I almost got there, but ran into a small problem, it was still difficult to find a circuit offering 8 serial ports and fast enough to manage them.

Everything changed in the early 2010s. At that time, it became possible to find a micro-controller circuit with 8 serial ports and enough power to manage everything. It was then that I looked into ARM type circuits from STmicro. From that point on, the problem shifted from the hardware to myself. In fact, in view of the possibilities of the new circuits, I wanted to add a whole bunch of functionalities, including USB bus management. Then, I entered into a spiral of redefining the functions of the object which, constantly, made me experiment with various solutions, all nevertheless unsatisfactory in my eyes. Unsatisfactory, because of the poorly defined hardware, and/or the software functionalities, which are also poorly chosen.

But, this series of failures allowed me to test a lot of solutions. And, a few days ago, as I was rearranging my stack of synths and rewiring everything, the obvious solution dawned on me. Now, right away, I saw very clearly what system I needed to have on hand to allow me to easily and flexibly wire all of my machines. I also realized that I wasn't far from the real subject, in fact. And that I just had to use all my previous developments and my previous ideas to achieve what I needed.

First, create not a hub or a switch, but simply an 8-port MIDI interface. I already have the prototype almost available. I just need to make some minor modifications to allow my 8 ports prototype to be connected to the USB port. So I have just made the necessary modifications to the circuit. 

The general idea is that it should remain simple to achieve. Thanks to the experience acquired with RISC-V processors during my previous work, I left with this type of processor :


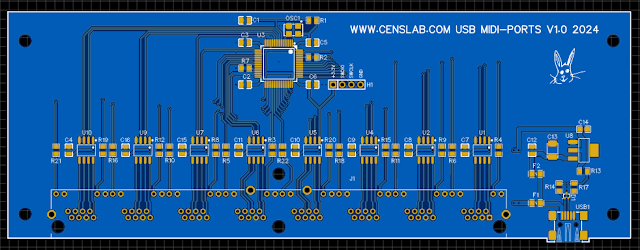
It's a fact, the printed circuit board does not seem very complicated to make. Once the components are implemented, it should look like this:


As you might expect, the MIDI connectors are not shown in this 3D view. In fact, it is not standard MIDI connectors but RJ45 connectors that are used. This is a particular characteristic of my system.
 
The difficulty for me is not the creation of the card but its programming. Working with the USB bus is not always easy. Fortunately, a few years ago I implemented a 2-port MIDI interface on a USB port using an ARM microcontroller from STmicro. So I have a software base, I'm not starting from scratch. Even if this does not guarantee that I will reach the end, I also have no means of debugging the USB bus, I am relying on the experience acquired to complete this subject.


Friday, April 12, 2024

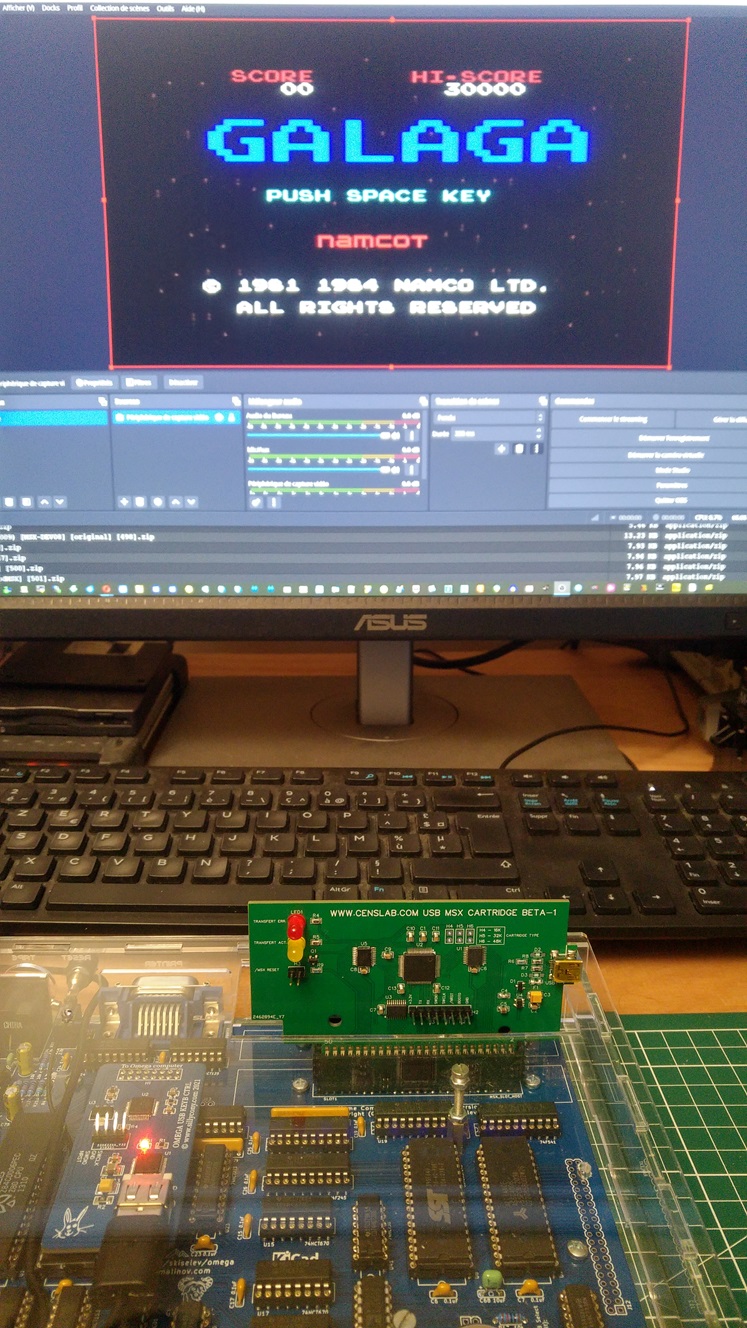
A MSX flash cartridge downloadable from USB : the last iteration.


 What is it about this time?


  • I did some redrawing work on certain tracks to make them more 'homogeneous'.

  • I powered certain interface circuits directly via the +5V power supply from the MSX connector and no longer with the 3.3V coming from the 5V USB to 3.3V régulator. the goal being to avoid electrical level problems with the test machine, a Panasonic FS-A1. In theory, 3.3V interfacing should not pose any problems, but in reality, it does.

  • And, I also added a small HF remote control module. This involves controlling remotely and without a physical link, an electrical outlet to automatically restart the MSX computer without having to manipulate the main switch, nor having to 'fiddle' with a RESET connection inside the computer. MSX. 


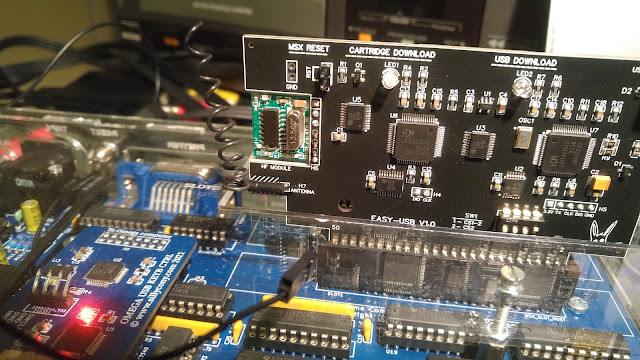
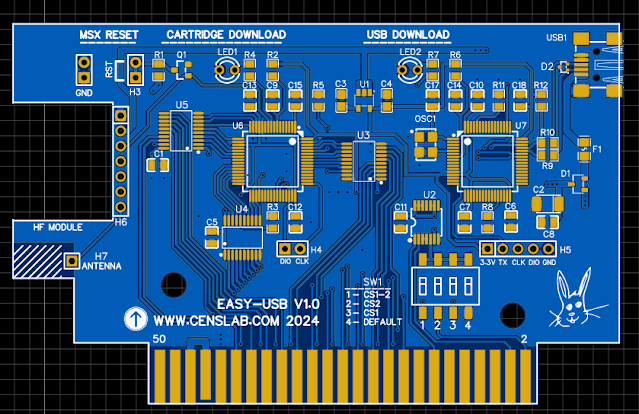
The final circuit should look like this :


Apart from the location of the HF module, the circuit looks almost the same as the previous version. Having written this, I also adjusted the external dimensions of the card so that insertion into the MSX connector no longer presents any potential gaps.

The final appearance should look very similar to this:


As for the code, the two programs concerning the processor which takes care of the USB communication and the one which manages the MSX bus, should not be modified. From the tests done, loading and making the loaded ROM available for the MSX computer works fine now.

Wednesday, April 3, 2024

A MSX flash cartridge downloadable from USB.


We have to be honest, developing quality equipment is not easy. Downloading a cartridge directly via the USB port from your PC to the MSX computer without any manipulation to do is a good idea.

But we must recognize that it is not done like that! I had to overcome hardware problems, software problems, implementation and component supply problems, etc. etc. 

Fortunately, most difficulties come from not having in-depth knowledge of the issues encountered. This is the study side of 'study and development'. We're getting there but it takes time.

So, after a certain number of prototypes, more and more functional, I am now arriving at the 'final touches'.

What is it about? In fact, with the idea of ​​making the loading and restarting process of the MSX computer automatic, just after copying/pasting a ROM file, you have to... restart the computer.

In 'real' life, a computer requires a power off/on sequence to restart on a new cartridge. This is not very practical. So I had the idea of ​​equipping my cartridge with a RESET signal output for the MSX computer.

Subsequently, it did not pose a problem for me to locate the right place on the OMEGA board to force the reset of the MSX computer.

But... that's not the case for everyone. And truth be told, I don't know many people who want to open up their MSX computer to solder somewhere a 'wire' from the outside.

In fact, you have to 'simulate' the action of the ON/OFF button on the computer. Again, there is no question of 'fiddling' with the computer switch. A relatively simple solution therefore consists of making a remote controllable electrical outlet. Obviously, there can be no question of connecting the MSX cartridge to an electrical outlet in any way.

A possible and elegant solution to this problem is to use an HF link. There is no question here of using a complicated or expensive module but rather a basic 'thing' capable of just remote control something.

After some research, I came across these modules:


I ran some link tests. It works really well. So, and as the emission module is very small, I decided to integrate it into my cartridge. In the end it gives this:


All I have to do now is have a few copies of this new version of the cartridge made. Of course, you will also have to make the 'famous' electrical outlet. I have some ideas for making such a socket 'easily' and very simple to operate, while still being safe to use.

Well, I have the impression of building a castle, but, even if it sometimes happens to have difficulty moving forward in the face of difficulties, it is clear that the subject is progressing and that it works better and better, which provides some satisfaction! 


Thursday, September 28, 2023

News...

 I published my first post on this blog in October 2020. For more than a year, I regularly posed diverse and varied subjects. During this period, I noticed that this blog did not interest many people. So to speak, no one.

Without even realizing it, I quite naturally ended up stopping my publications focused more specifically on computing and retro computing on this blog, favoring my other more general blog https://synthelectro-fr.blogspot.com.

A little by chance, I was able to observe recently that the consultations of this blog had greatly increased, despite the fact that I have not published anything new for over a year now.


This motivates me again to revitalize this blog. Especially since during February 2022 (last post on this blog), I studied several projects based on RISC-V processors.

Yes, because until then, I often used ARM processors from STMicroelectronics. But I admit to having difficulty, not with these processors, but quite simply with the graphical resource configuration interface, STM32CubeIDE. I know, this type of software is supposed to greatly facilitate the start of any project, but I find that this approach is a little too 'virtual'.

After all, I'm a guy from the 80s where absolutely everything had to be done 'by hand'. I kept this 'root' approach and I think that this makes it easier to 'become aware' of the operation of the processor used.

I came across the RISC-V processors from Nanjing Qinheng Microelectronics Co. 'fortuitously' and in particular their WinChipHead (WCH) brand.

So I now use the CH32V203 & CH32V307 range of processors.


So, since the beginning of 2022, I have started to migrate my projects to this new series of processors. One of the first examples concerns a 4-channel TIMER, easy to use, intended to be the worthy heir of the famous TMS1122 processor from TI. with some improvements, obviously.

I used this project to really discover WCH processors, and also to implement a concept that I appreciate and that I discovered on Facebook, the minimalist computing.

My Timer publication on the 'Minimalist Computing' group :


I am therefore thinking of publishing now on this blog the progress of my projects based on RISC-V processors.


Monday, February 28, 2022

ZX81 finally at home ;-)

After doing some research on the popular modifications to be made on a ZX81, I decided to modify the video output in order to provide a composite video signal directly usable on a monitor with this type of input.

Also, rather than increasing the RAM size to the usual 2KBytes, I decided to implement a 16Kbytes extension.

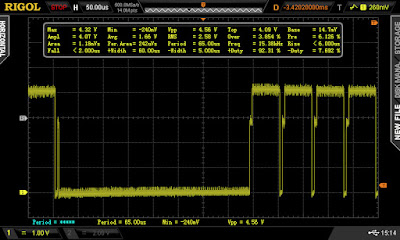
As a reminder, the keyboard connectors are cut. So I ordered a new membrane keyboard (see previous post). Moreover, after checking the video signal at the output of the PLA (pin 16), I know that the video signal is correctly generated :


In fact, after looking more closely at the video output, I could see that the cursor was indeed displayed. I was able to see 8 successive lines with this type of signal:


So, I decided to set up inside the HF modulator, a small circuit intended to improve the quality of the composite video signal, in particular to solve the problem of the back porch.


This type of circuit (ZX8-CCB) is available at this address

It is also possible to mount yourself a small transistor-based assembly which will have roughly the same effect, except that the back porch is not treated, which can be a problem on some monitors : 


Good, information about how the ZX8-CCB circuit works can be found there.

So here is what the modification of the HF modulator looks like after inserting the circuit  ZX8-CCB:


As I said at the beginning of the post, I also took the opportunity to increase the internal RAM to 16Kbytes. There is enough information on this subject on the web that it is not useful here to describe the implementation process. I used 16KBytes of a 32KBytes static RAM :


Voilà, once these modifications have been made, it remains to carry out the first operational tests.


And the tests to verify that the 16Kbytes are present :


So let's go :


And the result:


Conclusion: These small modifications require a bit of time but do not present any difficulty. With a working ZX81, these modifications allow a very interesting update of the machine for a very modest price.

Also, I didn't use a new membrane keyboard. I just trimmed the original connectors a few millimeters to remove the damaged part. It works perfectly.

Note that I have never been able to obtain an image with the RetroTink 2X Mini converter that I own.


The images shown here are from a ViewSonic brand monitor.

Finally, here I am, the owner of a fully functional ZX81. A computer that I first touched (in the literal sense) in 1983. I will always remember it as a very intense moment. I never bought one, however I was able to do a few programs on it at school the following year. As it was impossible for me to have access to a television set in my bedroom as a teenager, I fairly quickly bought a Sharp PC1500 which had its integrated display and which I had a lot of fun with.

sweet home ;-)